Testing in DevOps is not a trivial process, as it requires continuous testing, automated analysis, and fast-paced release verification. So TestOps, being a subset of DevOps focused on these tasks, is a set of technologies and approaches that brings testing documentation automation, test execution on CI/C, full control over automated testing via reporting, and defect management.
This is the second post in a series. Today, we’ll talk about how to automate data slice analytics generation and build two-way communication between testing and the issue-tracker with Allure TestOps metadata management.
Why is it important? Automated tests don’t talk, so we need to know as much as possible about the run, the suite, the environment, the feature, and the issue.
Table of Contents
How to build detailed, flexible and scalable data structure for automated testing
In the first post, we created our first test suite, analyzed it, and created the testing documentation. The whole idea of getting things done the TestOps way is to keep everything clean and compact.
With this logic, the test itself is the best place to keep the information about the test. Along with the usual testing frameworks properties, Allure works with additional metadata via code annotations:
The code annotations provide additional information: Microservice, Story, JiraIssue, Tags, DisplayName, etc. Each annotation makes test run reports more flexible and detailed, so the main task here is to make sure Allure TestOps gets all the data and maps it with test case fields correctly.
Allure Report users won’t need to do anything in addition to the work done. Allure TestOps uses the same syntax as Report.
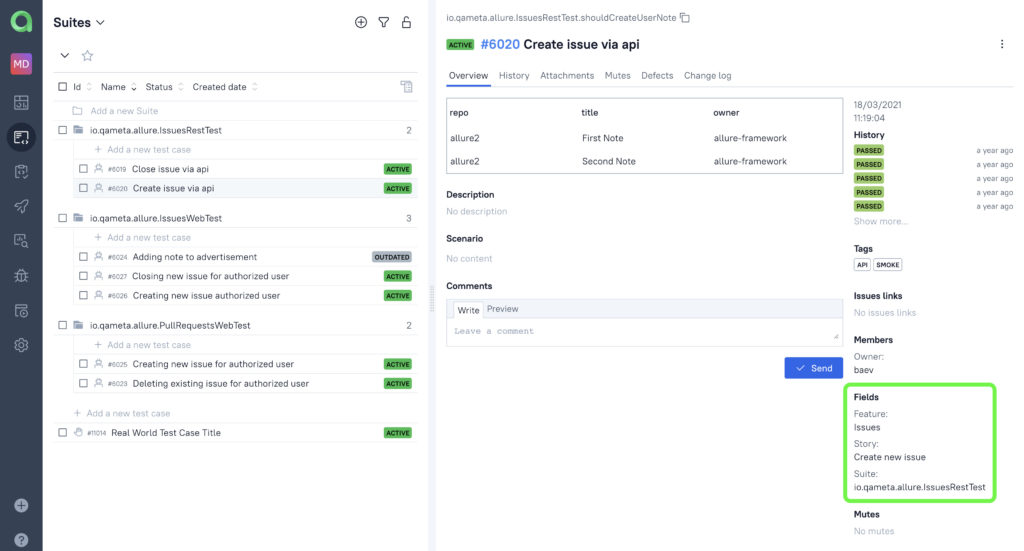
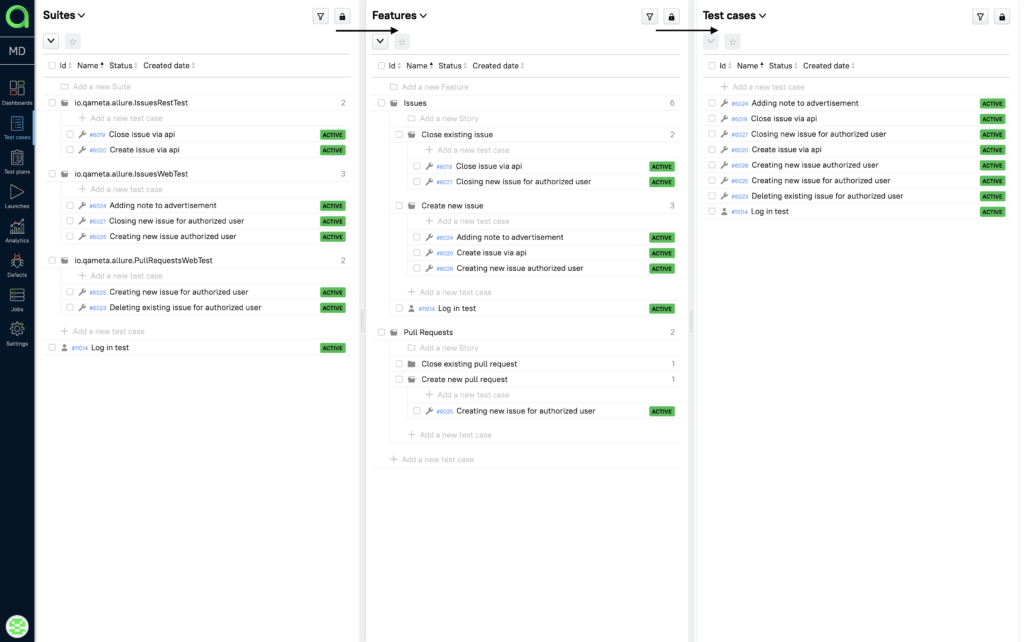
Let’s link the test case and the code. By now, each test case has Feature, Story and Suite:
How to explain what you need to Allure TestOps?
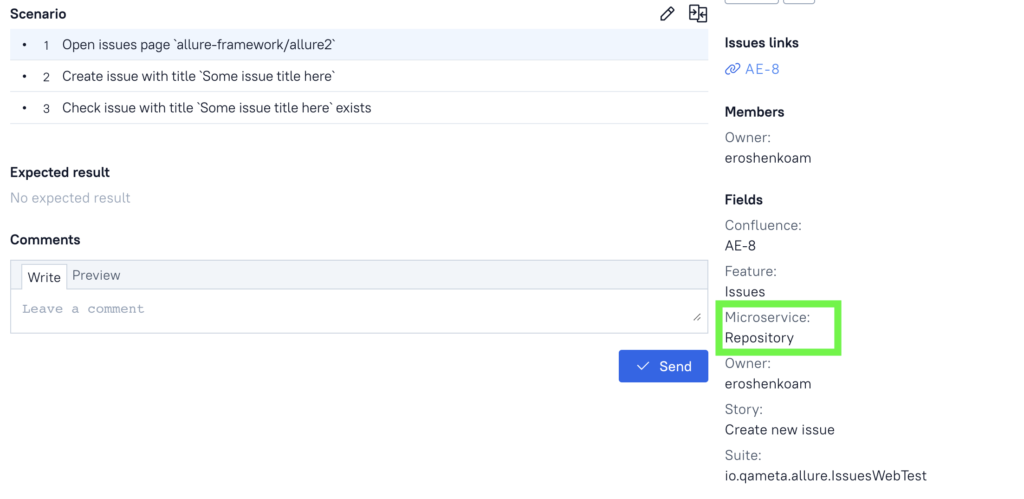
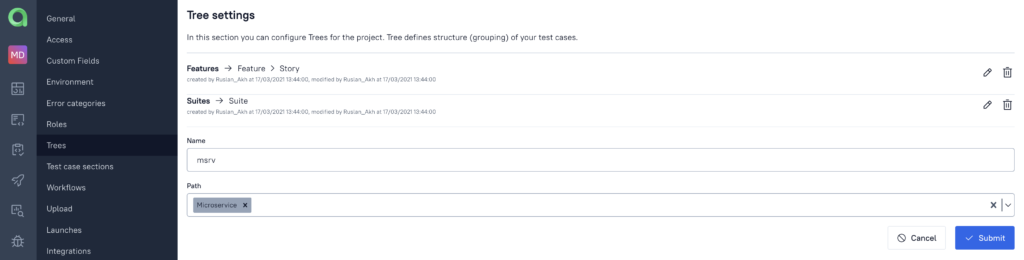
So, what if we need to analyze and group our tests based on different parameters? Let it be a ‘Microservice’. The microservice is defined as a custom annotation in the code and it will provide information about the source of the code tested.
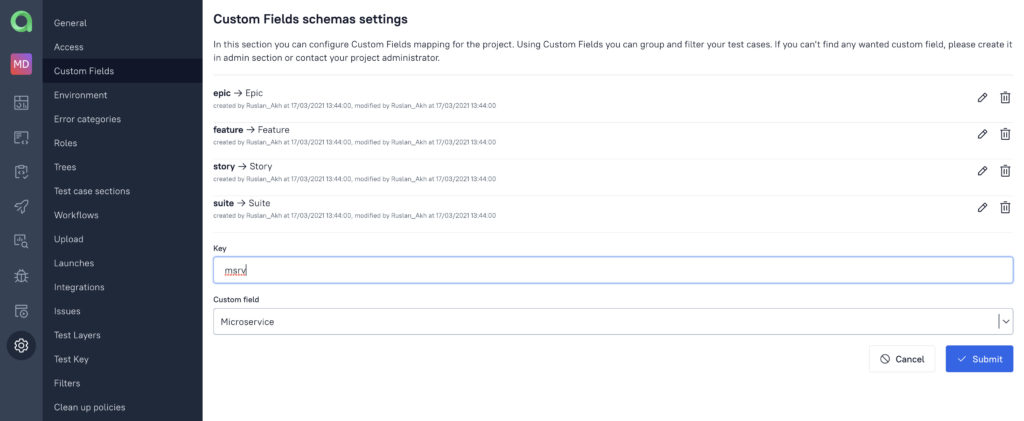
Go to Administration -> Custom Fields. Create a Custom Field called Microservice. And this is a label that is related to Microservice from the code.
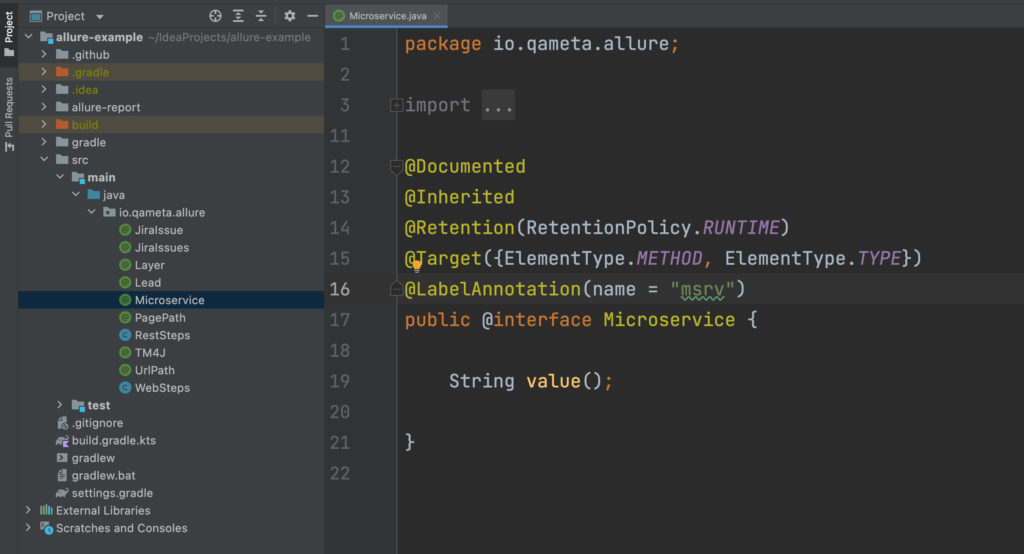
Now, set up the field in the project. So, in the “Custom Fields” section we need to create something which will go to microservice grouping. The key is provided in the annotation microservice. It will appear in the test results, and based on this key we will group the tests that go to one microservice or to another.
Let’s take a look at how the system works under the hood. After test suite execution, Allure generates an \allure-results folder that contains the JSON result files. In fact, Allure Report provides all the annotated labels within the result:
There are “name”: “tag” and “value”: “api”, “name”: “tag” and “value”: “smoke”, which means that the test in the code is already marked. So this data for each test will be provided to Allure TestOps.
It’s important to remember that the data will be updated at the launch as you run the tests, but the test cases will be updated only on the launch closure.
It means that new fields are displayed in the Launch -> Tree tab for the results first, and then, on the Launch closure, the Microservice field pops up in the Test Case interface! This is how the Live Documentation feature works.
The whole idea behind that is that you’d like to be sure everything works as intended within the launch before pushing the changes to the testing documentation. If anything goes wrong, just cancel the launch and keep your test cases safe. While everything runs fine, the information is automatically updated in the documentation.
Custom Fields FTW! How to build custom trees and additional UI marks for tests
Another great thing about metadata management in Allure TestOps is the fact you can build custom test case trees and layouts.
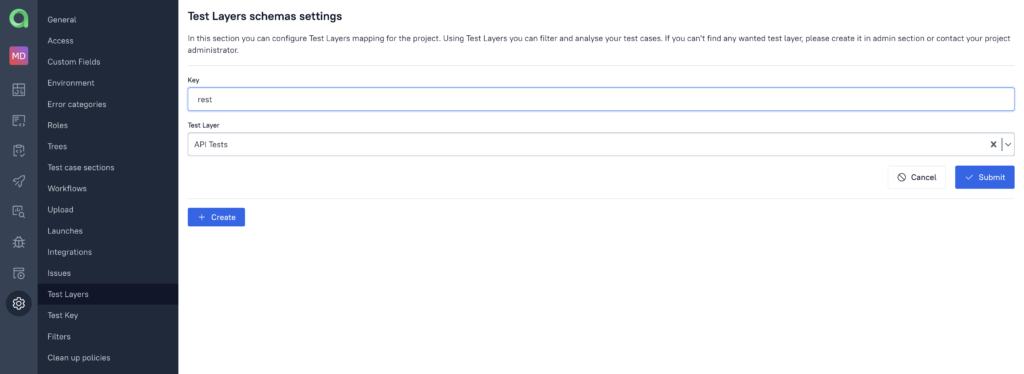
Let’s create Layer criteria. In our code, we can see that there are ‘rest’ and ‘web’ layers. So, it’s either API testing, or web UI testing.
For the test layers, create the key “rest” and link it to the global test layer “API Tests”. And do the same for “UI Tests”. Then we need to link the “web” layer to the global test layer, “UI Tests”. The important thing is to link them correctly: rest → API and web → UI.
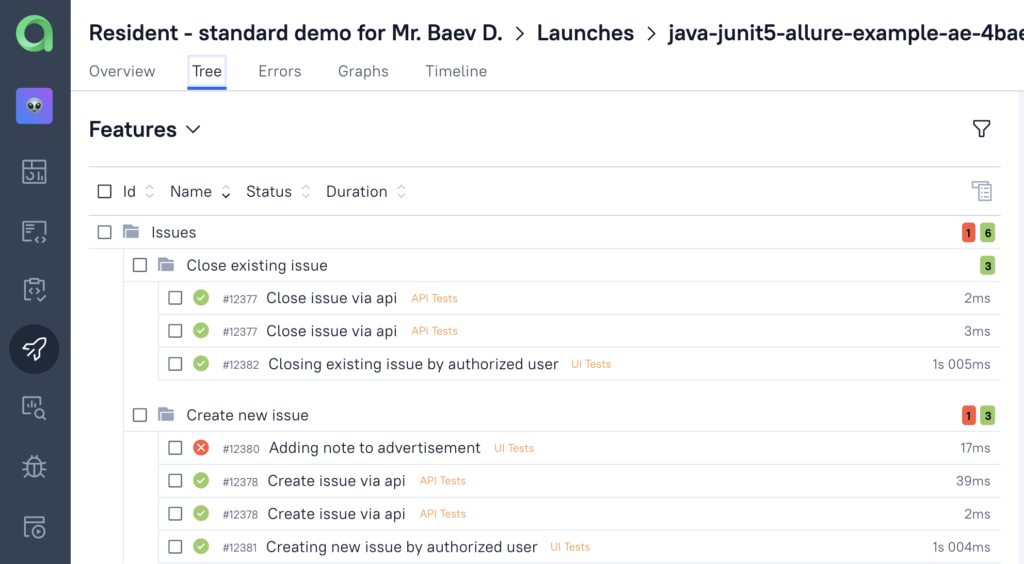
Run -> Build -> Launch -> Trees. When the results arrive, the information about the layers is here already.
Now, how can we use the information about this in the representation of the test cases and representation of the test results? Let’s go to the settings, and settings allow us to build a tree.
For example, there are “Features”, “Feature” and “Story” groups, already predefined by the system. But if it’s not enough for us, we can create another tree.
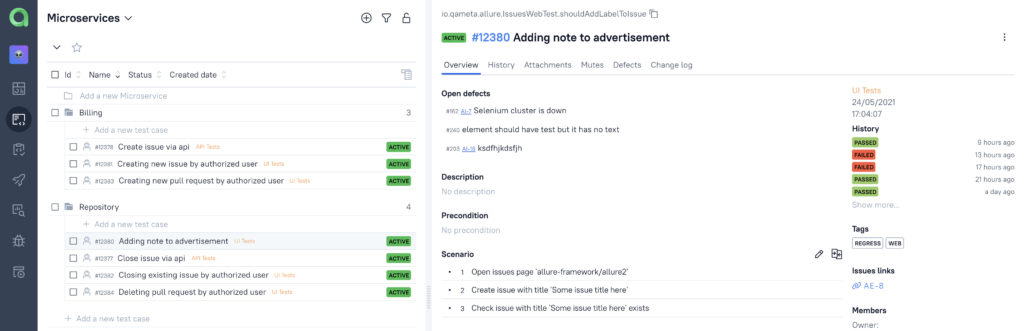
After that, in the Launches tab, we can build a custom tree, grouped by Microservice. And the neat part is that an overview screen of the Launch report automatically gets a widget that visualizes pass-fail-broken rates for custom groups.
So, this is how you can create automation rules for analyzing specific data slices with annotations and custom field automation in half an hour!
How to link test cases with JIRA
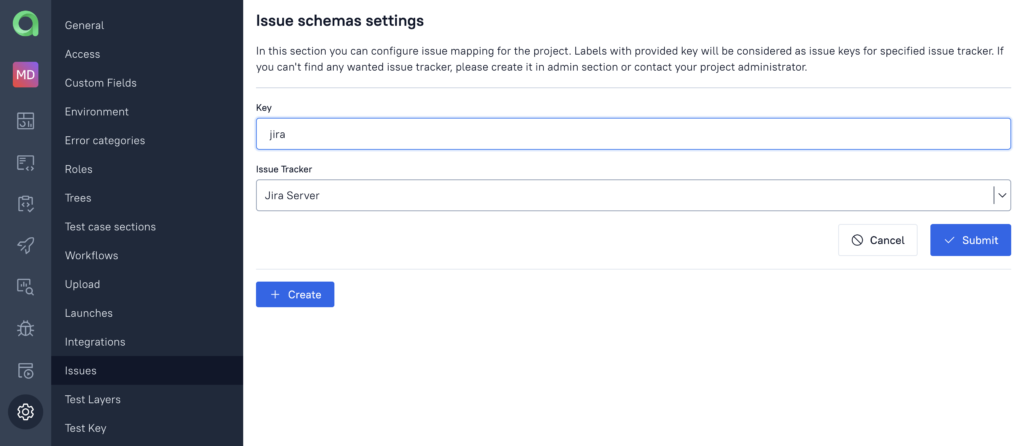
Custom fields are the superpower of a tester, when it comes to building easy-to-manage test suites. We can make our test case database even more integrated with the team infrastructure! Let’s create another custom annotation, Jira:
We’ll name it ‘jira’ and define the interface as JiraIssue. It means, any test case with @JiraIssue annotation will be available to Allure TestOps via project settings. The settings are defined the same way as for Microservice or Layer:
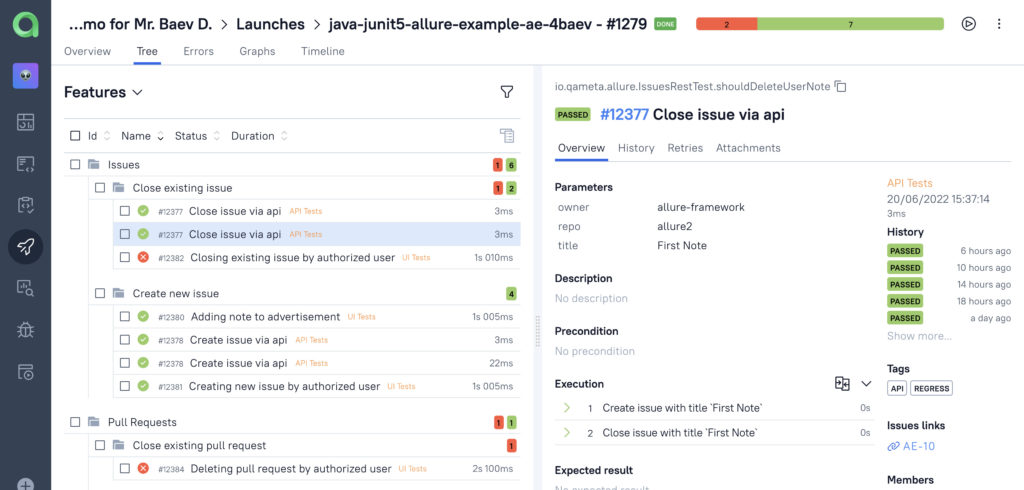
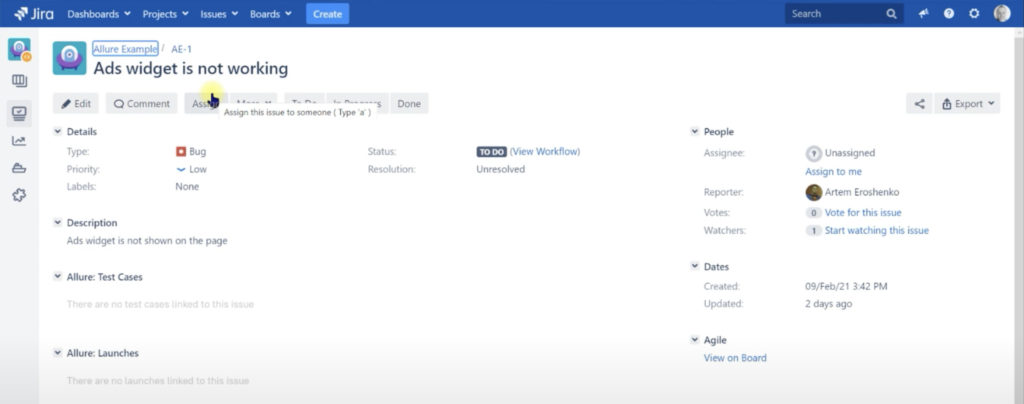
With this information, Allure TestOps will link test cases data to Jira issues. And again: Build -> Launch -> Tree. Here, we see that some tests got new clickable fields:
Allure widget for JIRA provides dynamic widgets to display test cases and launches connected with the ticket. That means, your team won’t even need to dig into Allure in case they need any information about related test cases!
Learn more about Allure tools
Qameta Software focuses on developing amazing tools that help software testers. Learn more about Allure Report and Allure TestOps on our website.
This is the end of the second part of ‘Allure TestOps at UltimateQA’ series. Next time, we’ll learn how to improve workflow with manual tests with some TestOps magic!