Ignoring Multiple Regions
I also wanted to quickly mention there are several other variations of ignore regions that you might want to use.
You can use ignore regions using find elements.
So as opposed to up here where I used a “By” locator, you can see when I hover over, it shows you I use the “By”.
You can also use find elements. So here, you can see I’m finding an element, the very first element.
And I’m applying an ignore region to that element. So just another variation. And, then, another very interesting variation is you can actually apply multiple ignore regions at the same time. So, I’ve signified that in this method right here.
So you, again, use “Target.Window.Ignore”. And you just come and separate your regions that you want to ignore. So in this case, you can see I’ve done two. I did the “PriceLocator” which is a “By” and then a “SubheaderLocator” which is also “By”.
So, if I actually run this, I do want to show what this looks like. Then, if we go see it in Applitools, ignoring multiple elements, I can open this up. We can see that there are multiple ignore regions here. You can see there’s an ignore region placed around this element. So, whenever we change something, we won’t care. There’s ignore regions placed around these elements just like before.
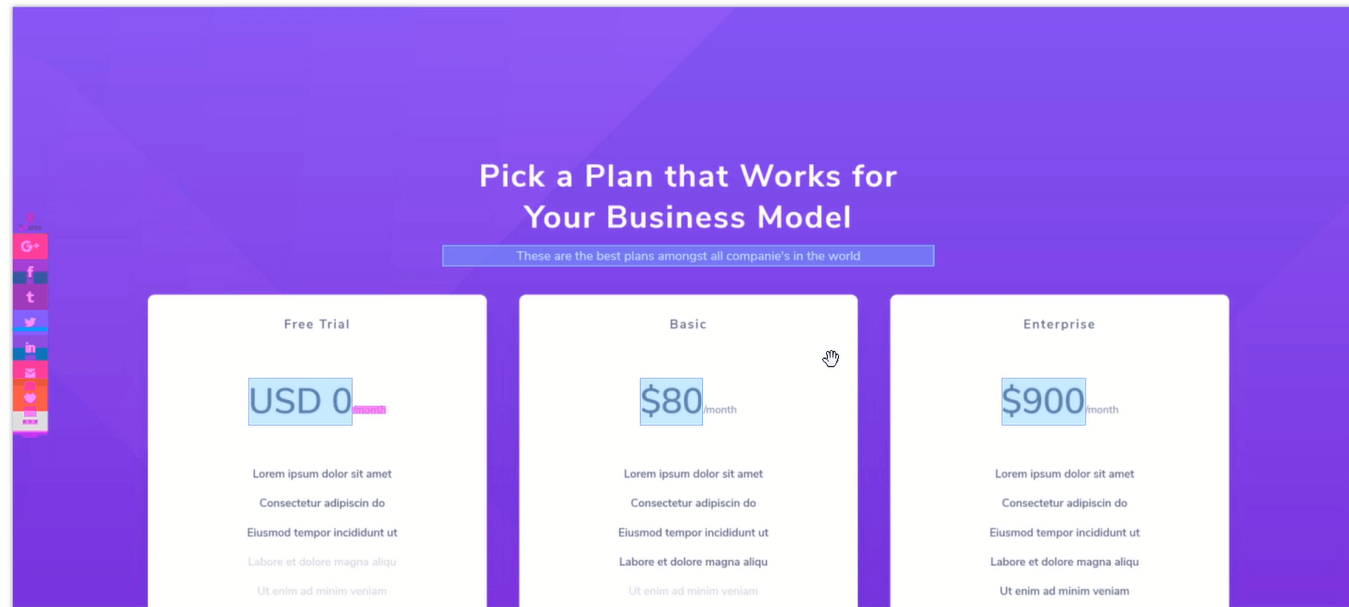
Now, think about, why are all of these regions ignored as opposed to just one?
Well, that’s because our locator actually returns multiple elements.
Let me go back for a second. This “PriceLocator”, if we pick its definition real quick which you’ll notice it finds an element with class name of this class. Okay? So, there are actually three elements with this class name. And so that’s why it ignores all three based on that.

So, just wanted to make sure you understand that so, even though, we’re putting in a single “By” locator. If there are multiple elements with that locator, then they will all be ignored which is exactly what’s happening here.
And as you can see, actually, this part did not get ignored because we no longer have an ignore region on here.

And so this is the part that is failing.
Floating Region
Let’s go ahead and now talk about the floating region.
The floating region, I’ve previously shown you before. But it basically allows an element to move within some specific boundaries and so we have a perfect use case here which is this social sharing icon.
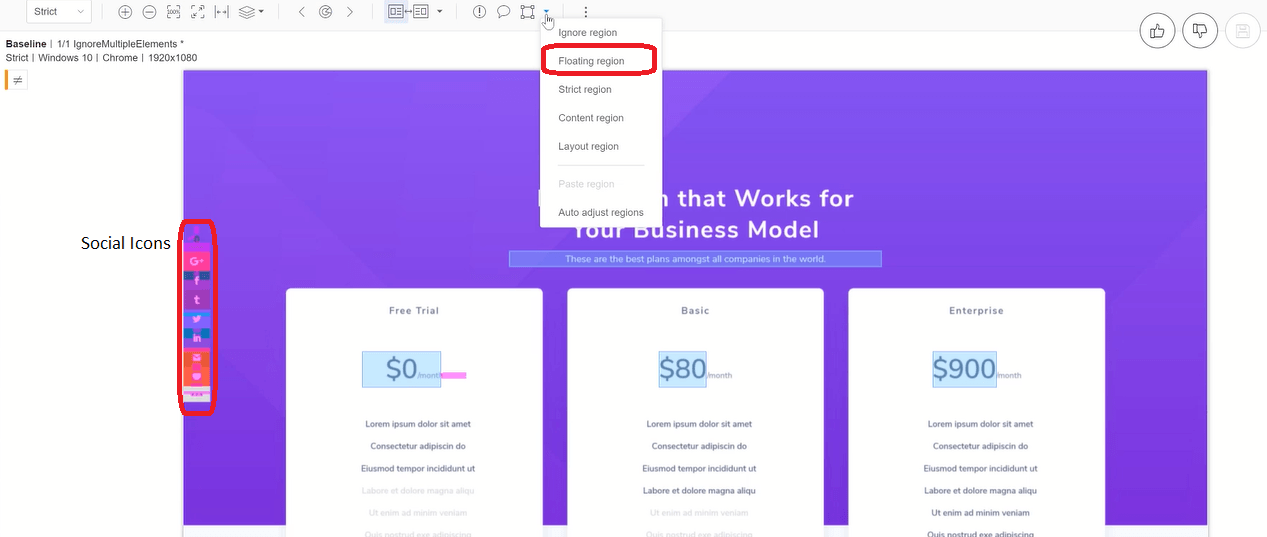
So if I click on the floating region, come over here and select this area. What it’s going to actually put a floating region on top of here. That’s going to allow this element to shift up and down.
So, if I tap through the content, you can see that the element shifts. But, that’s okay because it’s inside of a floating region. Applitools will not mark this as a failure.

This is the perfect use case because, for example, ultimateQA.com has dozens if not a hundred different web pages. And, on each web page, there is a social sharing icon. So, if you want to ignore this kind of stuff, the floating region is a perfect way to do it.
But, not only that, you don’t want to do all of that manually, right?
To do a floating region on a hundred pages, might be very painful to do manually. And, every single time a test runs, you need to do it. But, what you can do is use the Applitools API to do it in a coded manner, in an automated and a coded manner.
Let me show you how to do that!
Over here, you can see, I’ve created a test method that I call “FloatingRegion”. And, again, I’m doing the same thing as before. Opening Applitools and supplying it a new test name called “FloatingRegion”.
Then, I’m doing a check using “Target.Window().Floating” and identifying the “SocialSharingToolbar”.
Let me show you that locator.

It’s actually a pretty crazy insane locator. You can see that I’m using XPath and I’m using class name. And then it’s this insanely long string that identifies the class but it’s good enough to identify the social sharing icons as a single element.
So, when we run this test case what we get is a test that looks like this. And what you can see, actually, we had an automated floating region placed on top of these elements. So look if I tap through it again.
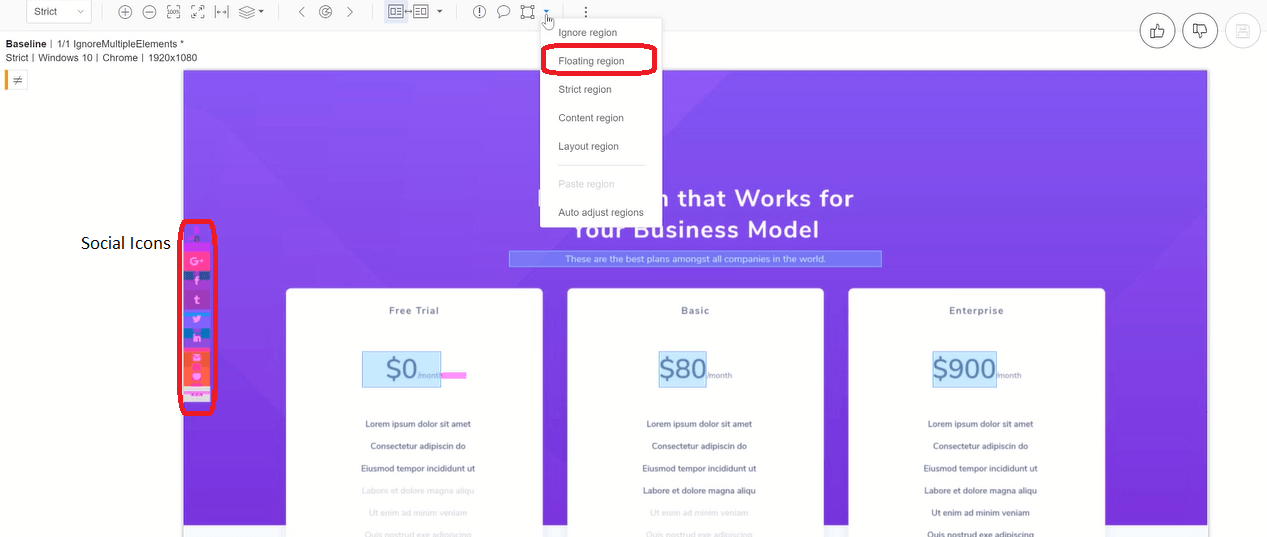
Oh, the baseline is not set actually. But as you can see, this now has a floating region around it. And if it shifts up and down, that’s not going to be a problem because Applitools knows that this is a floating region.
By the way, you also know there is a floating region because if you try to manipulate it, you can’t delete it. If it was something that was set manually, you can delete it. But, because it was set in an automated manner, You cannot delete this floating region.
It’s exactly the same way you do manually as you do in code. But in code, if you wanted to apply to many pages and constantly and repetitively apply it.
That is how you do it in code.
Strict Region
So, how about a strict region?
Well, a strict region is exactly like strict match layout mode. But, it basically allows you to apply a region to some element or area.
Now, why would you want to do this?
Well, maybe you are visually validating a page in layout mode. And, layout mode will only care about the elements and their relative position to each other.
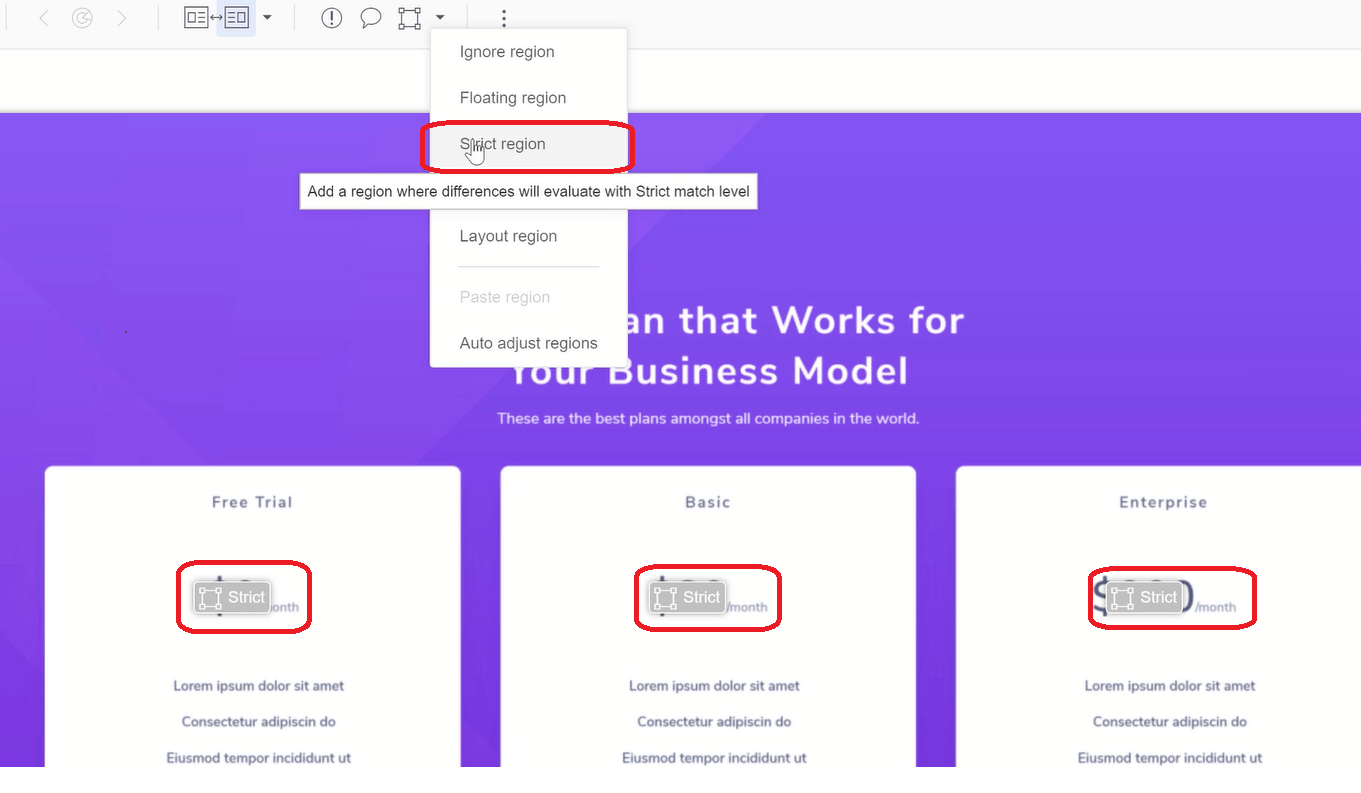
But, maybe, some page, some part of the application or the page, you actually want to visually validate that. Its content doesn’t change at all. So you can use a strict region there. So, maybe, in this case, you might want to come here and apply a strict region to this, even though the rest of the page is done in layout mode.
And so, as you can see now, a strict region has been applied. And, it puts this little box here, that says this is a strict region. So anything in here will be utilized with strict match layout.

Of course, you can delete it because I manually set it. So if I come here, you can see that this is delectable.
Now, over here, however, you can see, I have set three strict regions. These are not deletable because they were set in an automated manner.
And, so, I used code to set these strict regions. Again, same benefit as if you want to constantly apply a strict region to your baselines for specific elements.
Code is the way to go. So, how do you do it with code?
Let me show you that. If you want to do a strict region, that is over here, you can see the same, everything as before. I even utilized a “MatchLevel.Layout”. Layout match level here, so that it compares it in layout mode.
Then you can use a strict region using this syntax “Target.Window().Strict()”. And, I’ve applied it to the “PriceLocator”. That’s how you saw, that every single price locator got a strict region. Because, if I pick this definition, remember that we’re locating “By.ClassName(“et_pb_sum”)”.
There are three of these on the entire page. So they all get a strict region. If you wanted to do a single one, you can use find elements.
And then, pick the appropriate element from your collection. Whether is the first, second or third element. You can apply it like that as well.
Content Region
Next, we have a content region which is the same thing as the content match level.
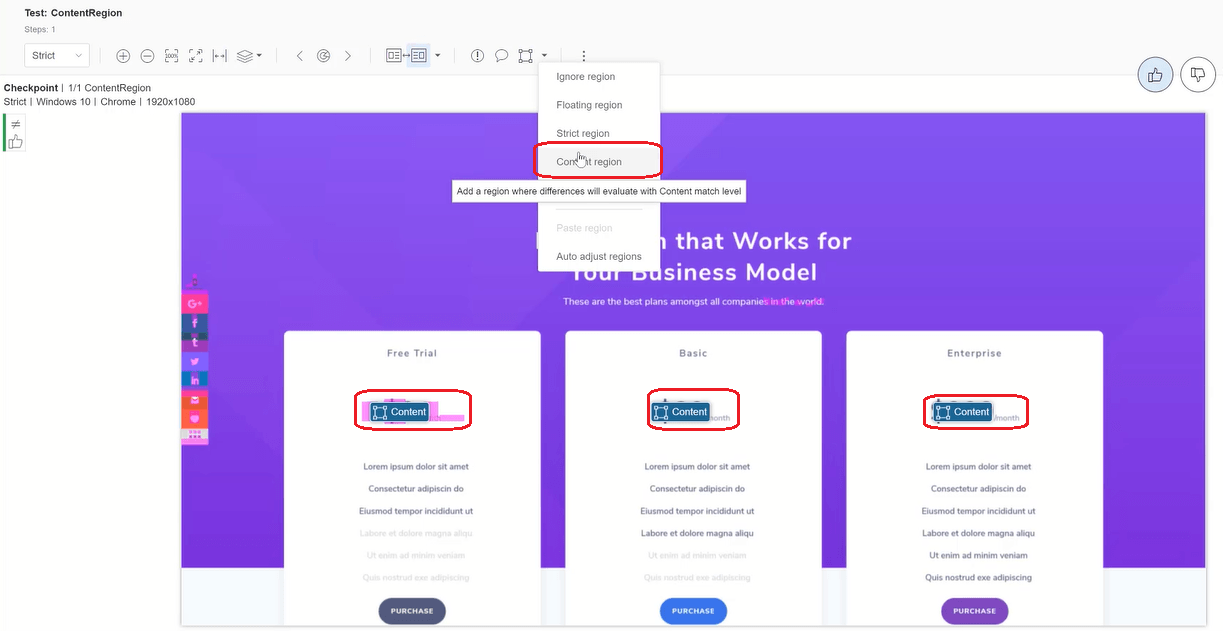
However, you obviously just apply to an element whether you want the element or a section to be visually validated with the content match level settings.
So, in this case, you might want to apply it to this area, right?
Remember, where we changed the text color of this area. If we don’t care about that, what happens is this gets highlighted. And then, it says “Content” here.
Letting you know that content match level settings validate this. And in here, I’ve applied it in an automated manner to all of these pricing options.
You can see that you can delete it. But obviously, our test fails, because the content match level is not sufficient to determine the difference between the dollar sign changing to a USD. So, that’s still failing.
However, if we change this to yellow, for example. This will totally pass because it would ignore this since content match level settings were applied. So this is nice because we can apply strict to a whole page.
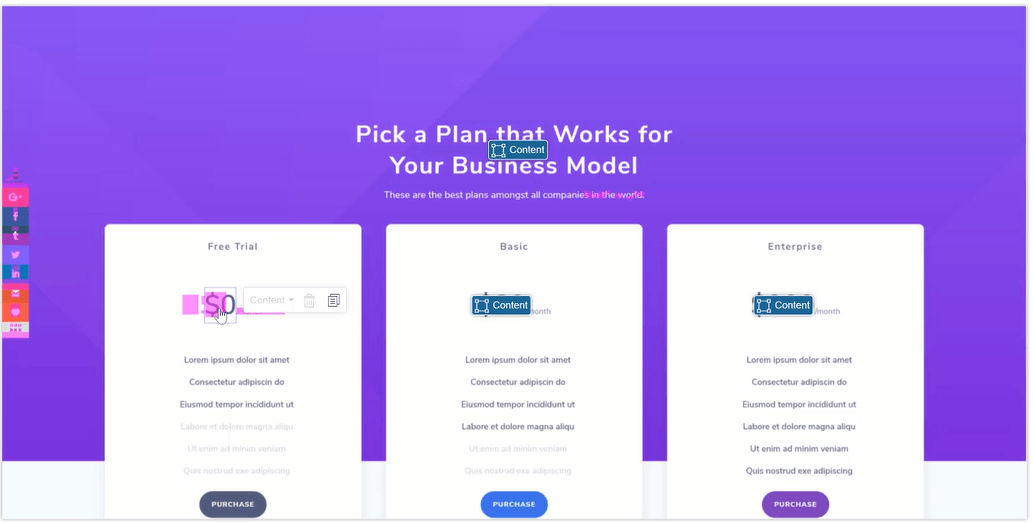
But then, if a certain area you want the color to change. For example here, you don’t care about the color, then you can apply the content match level settings.
Let me show you the code and how to get that handled. So, here is a “ContentRegion()” you can see, I’ve set up a test method.
To do it is just like all the others. You do an “Eyes.Check”. Then use “Target.Window().Content”, then I’m applying it to the “PriceLocator” as you actually saw in the UI.
Layout Region
Finally, we have the layout region.
Layout region is just the same as the layout match level settings. If you want to apply a layout level visual validation somewhere, then you just use the layout region. In this case maybe you want the layout applied to this.
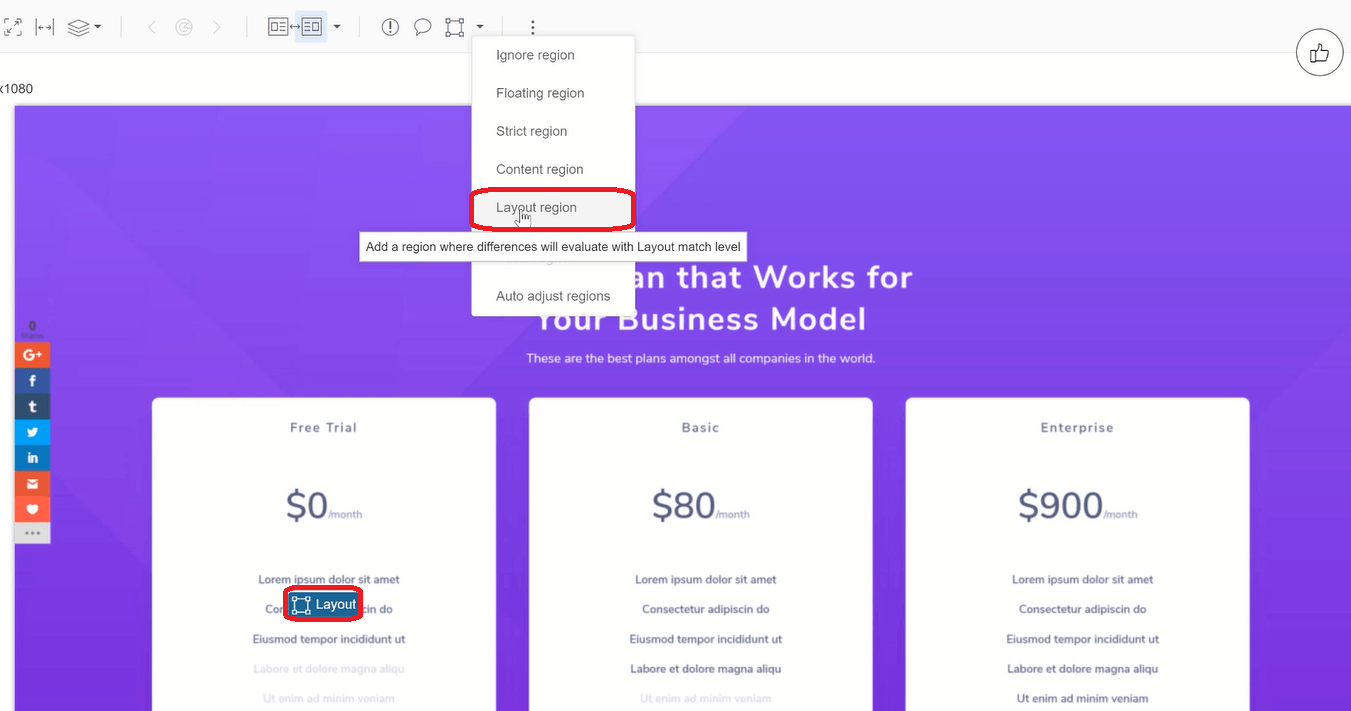
I’ve used layout previously for stuff like toolbars and sidebars. It’s really great for that, if you don’t care that your toolbars or sidebars are changing. You just want to make sure that the layout of those is the same, then that’s where you can use the layout region.
To do it in the code is very similar to all of the others. You can see that I am doing a check here and doing “Target.Window().Layout”.
Then, I’ve found an element using this XPath and I`ve applied it to that whole column area that you saw in the user interface which was this. This whole column I have applied to there.
So, anything that happens here, will not be spotted out unless it’s a layout problem.
Takeaway
So there you have it.

I have already introduced you to the different ignore regions in Applitools that are very useful for all testers in doing website Visual Validation. Which of these ignore regions did you find the most interesting? Please let me know in the commments below.

Can you please elaborate or have any idea about how layout algorithm works
It’s checking the layout of the page and making sure that the header, footer, center and so on are in the right locations. Some good docs are here https://help.applitools.com/hc/en-us/articles/360007188591-Match-Levels