
Must have documentation
- Appium Desired Capabilities that you can configure in your test automation code
- Appium Desktop tutorial by J Lipps from 2017
- Appium code examples in all of the different languages
- Appium tutorial series by Jonathan Lipps (Appium creator)
Mobile Automation Best Practices
Element Location Strategies
According to this article, this is the preference for element locators in terms of speed:
- Class name
- Accessibility id
- link text
- predicate
- class chain
- xpath
XPath
[XPath] should be avoided because it will be “invalidated by pretty much any change to your app hierarchy”. Furthermore, with XCUITest driver, used for iOS, it will be extremely slow.
Appiumpro.com
I’ve seen a 10X difference between using an Accessibility ID and XPath. Hence, it’s possible that simply by using XPath the test will be 10X slower!
Accessibility ID
When possible, this is the recommended locator because
- it’s cross-platform
- unique
- fast
Speed Comparison
The difference between an accessibilityID and an Xpath can be almost 10X!
| Element location on iOS mobile | |
| Locate button using accessibilityID (ms) | 135 |
| Predicate string (type == “XCUIElementTypeButton” AND name=”find-me-4″) (ms) | 148 |
| iOS Class Chain (ms) | 160 |
| Locate button using Xpath (ms) | 1228 |
How to scroll an element into view?
For Android, we can scroll any element into view like this
new UiScrollable(new UiSelector().scrollable(true)).scrollIntoView(new UiSelector().text("Sauce Labs Onesie"))Mobile test pyramid

Cons of Simulators/Emulators
Simulators/Emulators are drastically slower when running in the cloud


Appium Desktop
Start session with local Android emulators
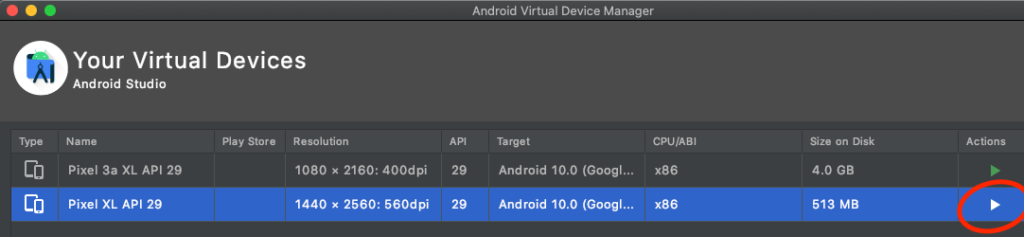
- Open Android Studio
- Open Android Virtual Device Manager (AVD Manager)
- Start your virtual device
- Open Appium Desktop
- Click Start Server
- Click Start Session
- And select Automatic Server
- We need to fill in the Desired Capabilities
- To get the full path of the native app, follow instructions here
Appium Desktop capabilities for a native Android App locally
These capabilities will start an Appium session for an Android emulator
{
  "platformName": "Android",
  "platformVersion": "10",
  "deviceName": "Android Emulator",
  "app": "/Users/nikolayadvolodkin/Documents/source/Appium/Android.SauceLabs.Mobile.Sample.app.2.2.1.apk",
  "appWaitActivity": "com.swaglabsmobileapp.MainActivity"
}
Here are the caps entered into Appium Desktop

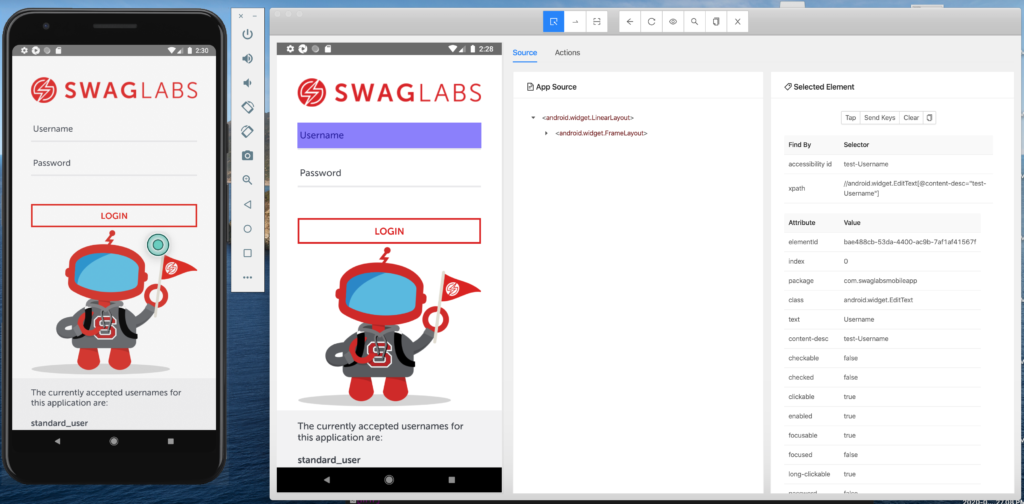
The appWaitActivity I got from the React app config for Android.
Sauce Labs Real Device Cloud (RDC)
Android
Running a test
Below are the minimum recommended AppiumOptions to execute an automated test on a real device. Get the full code here.
How to use Appium Desktop with RDC
Important points
- Always use the latest version of Appium Desktop
- When connecting to Sauce Labs, it’s recommended to set the Appium version.
- Only use the platform configurator for VDC and Emusim. Not for RDC.
- Need to provide an
appWaitActivityfor Android"appWaitActivity": "com.swaglabsmobileapp.MainActivity"
Use latest Appium Version
Make sure that you have the latest version of Appium Desktop. You will see many weird errors if it gets out of date, even by one or two versions.
Here’s a working configuration on Test Object. Make sure that you actually have an app uploaded. You also need to supply the API key and pick the Data Center.
{
  "platformName": "Android",
  "platformVersion": "10",
  "deviceName": "Google Pixel",
  "testobject_test_name": "Appium Desktop Test"
}
With iOS it’s easier to scroll to element and with Android it’s much harder.
You cannot use the JavaScript Executor to scroll to an element on native applications.
Connecting to a real device in the cloud
What are the minimum requirements to get access to a RDC device using Appium Desktop?
platformName
Static allocation means that you are supplying a device name. The ID of that device can be found in the device search area.
bundleId is important, check the session about 40 min in. We can find it in the Appium logs just by doing a search.
You can open another app such as Safari or email using the bundleId. However, you need to make sure that you are not letting your native app install first because by default RDC starts the native app first. Make sure to set "autoLaunch": false
{

"deviceName": "iPhone_XS_ws",

"autoLaunch": false,

"bundleId": "com.apple.Preferences",

"appiumVersion": "1.16.0"

}
The code above will start us in iPhone Settings instead of the native app because we provided the bundleId that points to the Apple settings and "autoLaunch":false
Pay attention to the context that you start your app in. If you want to automate a native app, start in the native context. If you want to automate a web app on a mobile device, you can just use regular Chrome and Dev Tools to locate your elements and you do not need Appium Desktop.
How to work with Emulators and Simulators
How to start an iOS session in Sauce Labs?
Here is a working configuration to run a test in Sauce Labs on iOS.
Start an Android session in Sauce Labs?
{
"deviceName": "Google Pixel 3a XL GoogleAPI Emulator",
"platformName": "Android",
"platformVersion": "10.0",
"appiumVersion": "1.16.0",
"app": "sauce-storage:sample-app-android.apk",
"appWaitActivity": "com.swaglabsmobileapp.MainActivity"
}
Need to provide an appWaitActivity for Android "appWaitActivity": "com.swaglabsmobileapp.MainActivity"
Every app has its own activity that should be added. You can search the appium-server.log for “activity”. If you are not sure which activity to wait for, ask your developers. However, you may be able to figure it just by looking at the logs.
Automated iOS Session in Sauce Labs?
- Upload the mobile application using the UI
- Reference the mobile application using filename or appId
capabilities.setCapability("app",
        "storage:filename=iOS.Simulator.SauceLabs.Mobile.Sample.app.2.7.0.zip");
Tips for Emusim
- Only use the Platform Configurator for VDC and Emusim. Not for RDC.
- Currently, you cannot type into an Emusim device using your keyboard, you have to do it using the device keyboard that pops up on the screen.
- You can interact with the app either through the Emusim device and then refresh in Appium Desktop. Moreover you can interact with the app through Appium Desktop which will then be shown in the running Emusim device.
Custom configurations and capabilities
Specify screenshot orientation for iOS Devices
In addition, you can use this setting to tell Appium which orientation you want your screenshots in when you take them.
The options are:
auto: don’t enforce any screenshot orientation. Just pass along the screenshot given by XCUITest.portrait: enforce portrait orientation for the screenshot.portraitUpsideDown: enforce the “upside-down” orientation for the screenshot.landscapeRight: enforce a landscape (turned to the right) orientation.landscapeLeft: enforce a landscape (turned to the left) orientation.
Set this as such driver.setSetting("screenshotOrientation", "landscapeRight")
Want to learn more about Automated Testing Practices? I have selected the Top 17 Automated Testing Practices here.
Trackbacks/Pingbacks